
How to Screed a Floor: An Expert Guide

If you’re in the process of levelling out uneven flooring, installing underfloor heating or simply renovating the floor of your kitchen, bathroom or garage, you may have reached a point in your project where you’re ready to apply the screed floor layer. So, how do you screed a floor?
Contacting an experienced screeding professional will always be the best way to ensure that this process is performed as accurately as possible, decreasing the possibility of costly and time-consuming repairs further down the line.
However, as screeding tools and screed mix are widely available, many DIYers choose to undertake the task themselves to save on costs and work to their own timelines. Below you will find out how to screed a floor step-by-step, including important factors to keep in mind before, during and after installation.
Choosing the Correct Screed
Before setting out to screed a floor, it is essential to select the appropriate screed type for your project. The benefits and drawbacks of each screed type vary, and certain elements of the screeding process, such as preparation, thickness of screed and drying time, differ depending on which variety of screed is being applied.
The most common types of screed used across both commercial and domestic projects are:
- Unbonded Screed: As the name suggests, unbonded screed is not directly bonded to the concrete sub-floor, but instead sits on a damp-proof membrane. It protects your floor from moisture in the subfloor; however, it is more likely to curl.
- Bonded Screed: Alternatively, you can use a bonded screed, which is bonded to the concrete substrate floor through the use of a bonding agent or primer. Bonded screed is often used for thinner screed applications where a heavier load or footfall is expected.
- Floating screed: A floating screed is a form of unbonded screed which is generally applied on a layer of insulation, such as underfloor heating.
In addition to the traditional sand and cement screeds outlined above, other types of screed, such as self-levelling liquid screed, have become popular over recent years. However, due to the industrial machinery required to mix and pour this form of screed, it is highly recommended to hire an experienced contractor to carry out the application process. The following guide, therefore, refers only to the use of a traditional sand and cement screed.
How to Prepare a Floor for Screeding
Once you have decided on the most suitable screed type for your project, you’ve reached the stage where you can begin the work on your floor. As outlined previously, the way to prepare your floor for screed will vary depending on the type of screed you will be applying.
Unbonded and Floating Screeds
- The first step is to clean your concrete base well. Removing all dust, debris and grease from the subfloor will aid the smooth finish which you are aiming to create with your screed flooring.
- Cover the floor with a damp-proof membrane, such as polythene or PVC sheets. The sheets should overlap by at least 20cm and be taped together, and you should also fold the sheets up by 10cm to cover any walls or pillars.
- Line the walls and pillars with compressible material, such as edging foam, to protect these surfaces from any damage due to screed shrinkage.
Bonded Screeds
- Using a chipping hammer or pick, roughen the entire surface of your concrete subfloor. This exposes the aggregate, which subsequently allows the bonding process to take place.
- Ensure that your base is free from dust, debris and grease stains to avoid the screed bonding to anything other than the floor.
- Apply a bonding agent to the concrete, such as PVA, epoxy resin or SBR (styrene-butadiene rubber), following the instructions on your product label.
How TO MAKE A SCREED Mixture
Once you have prepared your concrete sub-base, the next step in the process is to create the screeding mixture. You will need to have answered the following questions ahead of mixing your screed:
- What is the measurement of the area you are intending to screed? This will inform how much screed mix you need to make up to complete your project. You can find useful screed calculators online to estimate the quantity of screed you’ll need.
- What depth of screed do you need to apply? This will also inform the amount of screed mixture you will need to prepare. If using an unbonded screed, the depth of your screed should be at least 50mm thick at all points. For a bonded screed, a layer of at least 35mm is ideal, but the depth can vary from 25mm to 40mm depending on the conditions of the concrete base.
Once you have the correct measurements to hand, you can mix your screed. For ease, ready-mixed screed mixtures are readily available, but you can also make your own mix. A traditional screed ratio is typically 1:4 cement to sand, which creates a workable texture. For a finer screed, sharp sand is often used, whilst a more hard-wearing screed mix will need a coarse aggregate.
An unbonded screed is more likely to weaken due to microcracks. You can reduce the risk of this by reinforcing the screed mixture with polypropylene fibres before adding water, or placing crack control steel mesh over your subfloor, which sits in the top half of your screed.
How to Screed a Floor
Once you have prepared your floor and screeding mixture, you are ready to begin applying your screed. The instructions below will guide you through this process step-by-step:
- Divide your floor into sections – The simplest way to do this is to use straight-edged timber battens, which are cut to the intended height of your screed layer. Keep the batten in place by laying around 3cm of screed, and wet the batten to facilitate an easier removal once you’ve finished screeding. Divide the room into strips around 3-4cm wide, confirming that each strip is flat using a spirit level.
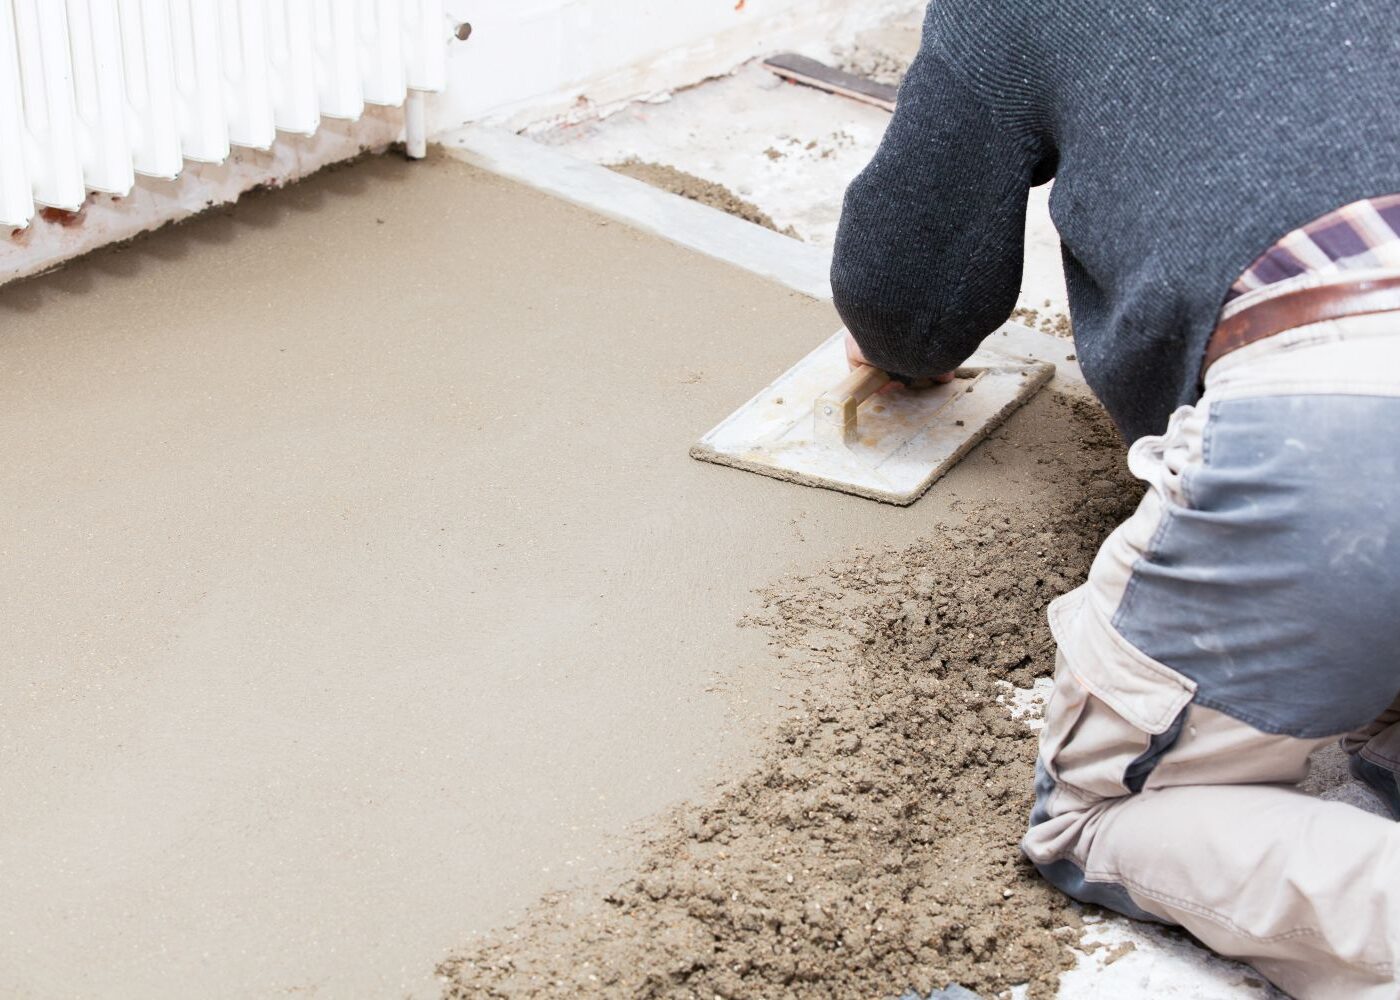
- Apply a layer of screed to your first section – Ideally, start with the section of floor furthest from the entrance, spreading the screed mix with a trowel. To avoid common issues with poor compaction, ensure that you compact the screed mix effectively with a screed board and tamper the edges with a hand tamper.
- Level the screed layer – After laying your screed, use a screed board or a very straight piece of lumber to level the screed out. Using a side-to-side sawing motion, push the straightedge across the surface of your screed and slightly tilt it to make the corner a cutting edge.
- Repeat the process – Follow the above process for each individual floor section until your project is complete. As you complete two sections, remove the timber separating them and fill in the gap.
- Float your screed – In order to remove flaws in your screed layer, immediately bull float the screed. You can then repeat this process a second time after the concrete has stopped bleeding, and after excess water has evaporated or been removed.
- Cure the screed – Cure your screed layer for at least 7 days. One way to do this is by covering the screeded area with a polyethene sheeting with the edges sealed. If temperatures decrease to below 10ºC in a 24-hour period, you will need to let the screed cure for longer.
- Allow the screed floor to dry – A fast-drying screed, such as calcium sulphate screed, can be walked on in just 24-48 hours; however, a sand and cement screed floor will need more time to completely dry, even after curing. During this time, you should avoid any vehicle traffic and avoid installing flooring, such as tiling, for a minimum of three weeks. Generally, you can calculate the required drying time by allowing one day for every mm of screed depth.
Contact the Experts
As demonstrated above, it is possible to screed a floor without professional assistance from a screeding contractor. However, there are several important factors which must be taken into account should you wish to carry out a screeding project domestically, such as in your wet room shower. It is therefore highly recommended to contract a team of screeding professionals to carry out your project for you, to guarantee that the best decisions are taken for your project.
The cost of hiring a screeding contractor will vary depending on factors such as the size of the screeded area and the depth of screed required, as well as the quality of the application. At Concrete Flooring Solutions, our specialist screeding team have the knowledge and expertise to complete your screeding project to the highest standard for an affordable price.
Enquire with us today for more information regarding our specialist screeding services.